 Lorsqu’on rédige beaucoup de documents pour le travail, cela peut devenir lassant d’utiliser toujours les mêmes polices.
Utiliser des caractères un peu exotiques permet d’attirer l’attention dans un document, une présentation powerpoint ou autre. C’est aussi un élément clef du graphisme et cela peut représenter la base de la charte graphique d’une entreprise ou d’un site web. Installer une police d’écriture est enfantin, et il y a accès gratuitement sur le web à des milliers de polices de caractères en tout genre, alors pourquoi s’en priver ?
Le Livre des polices :
Le Livre de polices (Font Book) est une application fournie avec le système d’exploitation macOS. C’est une base de données de toutes les polices installées sur le mac, dans laquelle vont venir piocher tous les logiciels pour afficher les polices (sauf cas particulier pour les navigateurs internet).
Ainsi lorsqu’on veut installer, supprimer ou consulter l’ensemble des polices installées sur une machine c’est toujours dans le Livre des polices que ça se passe.
Les polices sont par défaut classées en 2 catégories : Ordinateur et Utilisateur. C’est dans ce dernier que vont se trouver les polices que l’on installe soi même bien évidemment.
La création de collections intelligentes est possible en fonction de critères que l’on choisit, à la manière des Dossiers intelligents du Finder.
Comment installer une police d’écriture sur un Mac :
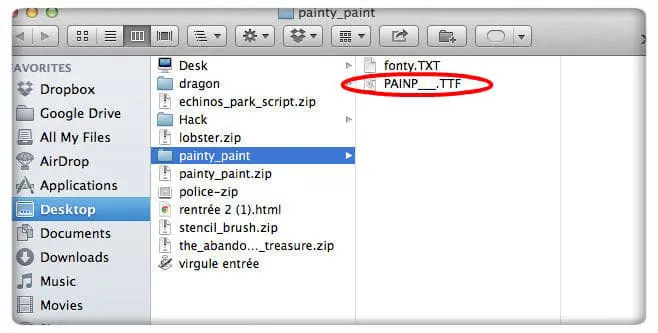
Pour illustrer l’installation d’une police, prenons l’exemple de l’installation de la police Aquawax disponible sur Dafont, comme des milliers d’autres polices. Allez sur Dafont, téléchargez Aquawax et double cliquez sur le Fichier Zip pour le décompresser. Ouvrez ensuite le Dossier Aquawax dans le Finder, vous verrez alors les trois Fichiers .TTF correspondant aux 3 poids (black, light, medium) de cette police.
Sélectionnez les 3 fichiers et effectuez un glisser/déposer dans le Livre des polices pour effectuer l’installation.
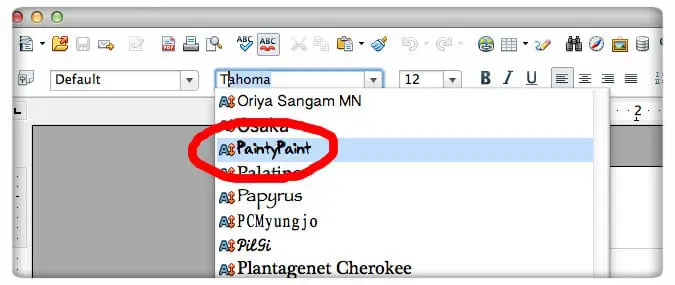
Aquawax est maintenant présente dans le Font Book (livre des Polices) et tous les logiciels de votre ordinateur y auront accès, comme dans dans cet exemple avec Open-office.
Si vous installez une police pour l’utiliser dans un logiciel déjà ouvert, il faudra peut être le redémarrer afin qu’il reconstruise son « font cache » et ainsi intégrer la nouvelle police.

Il y a des polices vraiment extra ordinaires et de qualité sur Dafont. Même si toutes n’offrent pas la même flexibilité au niveau majuscule / minuscule ou gras / normal / italique, cela vaut la peine de prendre 5 min pour naviguer dans les différentes catégories et trouver celle qui conviendra parfaitement à vos besoins.
Activer ou Désactiver un Police de caractère:
Ceci est une petite astuce bien pratique lorsqu’on fait du développement front-end ou que l’on crée des sites avec des wysiwygs, car elle permet de s’assurer que le navigateur a bien téléchargé la police depuis le serveur et non pas utiliser le Livre des polices pour l’afficher.
Pour désactiver un police, faîtes un clic droit sur le nom de la police et cliquez sur Désactiver la famille « … », ou encore plus simple cliquer sur l’icône « check » ☑︎ la plus à droite.

Visualiser la police avant de l’utiliser:
Pour visualiser le rendu d’une police avant de l’utiliser dans un document cliquez sur Aa|, un texte lorem ipsum s’affiche et on peut choisir la taille de police et chaque poids de police.

Installer Plusieurs Polices d’écritures Simultanément
J’aurai souhaité découvrir ça plus tôt… parce qu’en fait c’est vraiment enfantin, fait gagner un temps précieux et peut être renouvelé à volonté.
Suivez le guide.
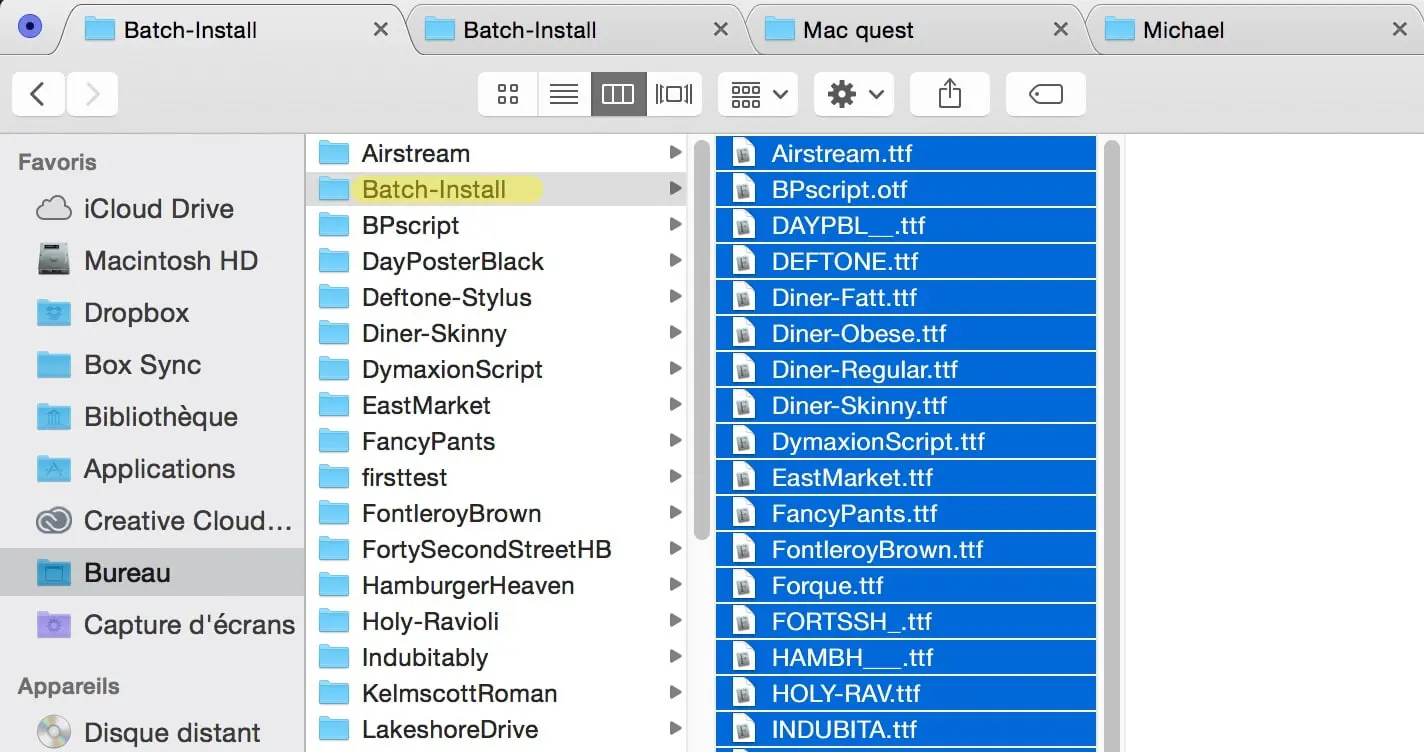
Préparez un dossier contenant toutes les polices à installer:
C’est en fait la partie la plus chronophage de l’ensemble. En effet les polices étant toujours disponibles au téléchargement en fichiers zippés il faut d’abord extraire toutes les fonts puis ensuite déplacer tous les fichiers de polices eux mêmes (le plus souvent des .ttf) dans un dossier comme celui j’ai nommé ici « Batch Install ».
Cette opération est rendu plus facile grâce à Total Finder dont le mode double permet d’éviter d’avoir à passer d’un onglet à l’autre dans le fenêtre du Finder.
Glissez Déposez dans le ‘Livre des Polices’:
Démarrez l’application Livre des Polices depuis LaunchPad ou SpotLight et glissez déposez simplement toutes les polices.
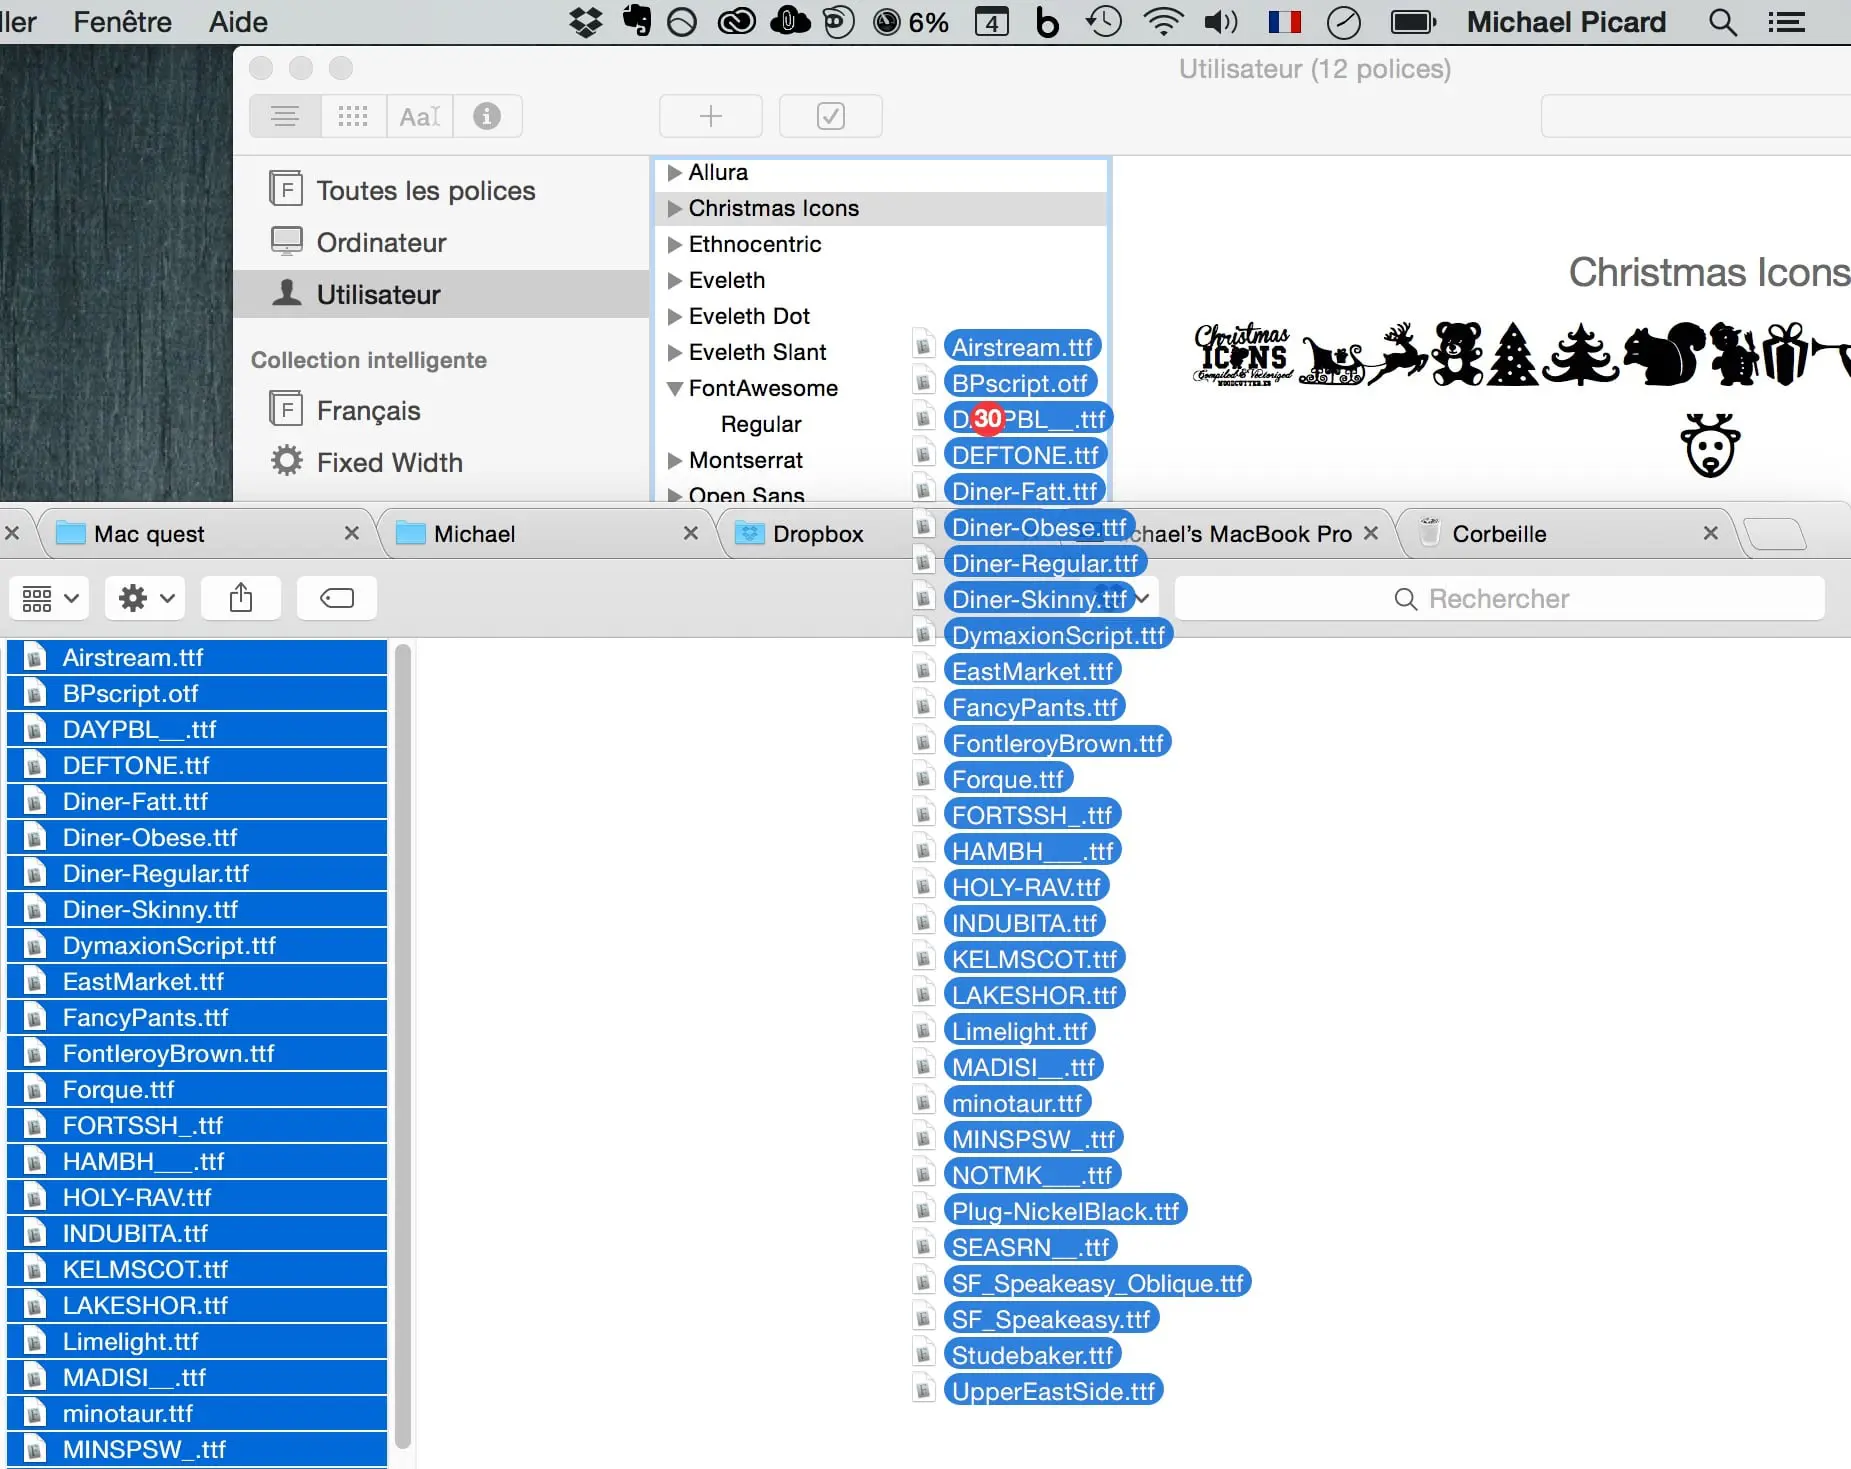
C’est fait. Il faut à peine 3 secondes au ‘Livre des Polices’ pour installer 30 nouvelles fonts.
Le meilleure dans tout ça c’est que je peux garder le dossier en question contenant toutes mes polices quelque part sur un stockage cloud pour répéter l’opération sur différentes machines ou lorsque j’achète un nouvel ordi ! Ainsi en quelques secondes je peux réinstaller des centaines de polices.


Bonjour, cela fait plusieurs fois que j’essaye d’installer la police « écolier » téléchargée sur le site DaFont. Cette dernière est marquée comme étant installée, mais une fois Pages ouvert, elle n’est pas affichée dans la liste des polices. Pouvez-vous m’aider s’il vous plait ?
@Bernard, je viens d’installer cette police et elle est bien disponible dans TextEdit donc elle doit l’être dans Pages également. Avez-vous redémarrer Pages après l’installation ? Vérifiez qu’elle apparaît bien dans le livre des polices.
Bonjour,
je ne vois pas les polices installées (comme décrit) dans le logiciel « Pages »
Pouvez vous m’aider ?
Merci
@Joelle, je pense que si vous ne voyez pas une police dans « Pages » c’est probablement qu’elle n’est pas installée correctement. La voyez-vous bien dans le Livre des polices ?
@Michael,
je n’ai pas d’erreur et je la vois bien dans le livre des polices
Si cette police est téléchargeable gratuitement donnez-moi un lien et je l’installerai pour voir si elle apparaît dans Pages.
Bonjour, il s’agit de la police Sitimerry script. Elle est téléchargeable librement.
@Joelle, non je ne la trouve null part téléchargeable gratuitement.
Bonsoir, en fait je l’ai trouvé sur un site ou il y a des polices gratuites pendant un temps limité.
J’ai refait le test avec une autre police et là c’est OK. La différence :
– extension otf ==> KO
– extension ttf ==> OK
peut-être est-ce lié à l’extension ?
Merci
@Joëlle, peut être que le fichier .otf est corrompu et que c’est pour cette raison que la police n’apparaît pas dans Pages. Normalement macOS peut utiliser des polices au format OpenType
.otf.Bonjour, est-il possible d’installer une police venant de safari sur un mac ? (la police en question est « webletter ».
merci d’avance.
@Bérénice, si vous voyez une police dans Safari c’est qu’elle vient du site que vous visitez. Cherchez « webletter font » dans un moteur de recherche et vous trouverez si elle disponible au téléchargement gratuit ou à l’achat.
bonjour mickael comment fait on pour avoir cela sur pc merci je suis parolier et pas informaticien mais si tu connais des dessinateurs de bd qui cherchent des auteurs je suis aussi interessé
cordialement
Bonjour thaly, la procédure est forcément similaire sur PC, double clique sur un fichier tiff et ça ouvrira certainement le bon logiciel. Pour trouver des dessinateurs tu peux essayer ici peut être : http://www.bdgest.com/forum/bd-atelier.html